In the Cage
At the beginning of this level you are trapped inside a cage. Push the block away from the flares and pick them up. Then use the lever to open the door. Kill the three monkey like creatures that come rushing in. Step outside.Around the Cage - Goodies, section can be skipped
Just before the door of the cage you can find Uzi Ammo. Climb up to the left to reach a small Medi Pack and flares. Run down into the cave. On the right another monkey like creature will attack you. In the far right corner you can find shotgun shells. Through the fence you can see an area with golden/red and green parts, in the distance you can see M16 Clips. In the middle part you will find more shotgun shells. Be careful, there is also a spike trap. Jump over it to reach the left cave. Here is a large Medi Pack in a corner. Behind the fence is a chamber with shotgun ammo. The camera shows you another monkey creature in the cage where the level begun. Make your way back up to the cage and on your way kill the creature. Get back inside the cage.Underneath the Trapdoor
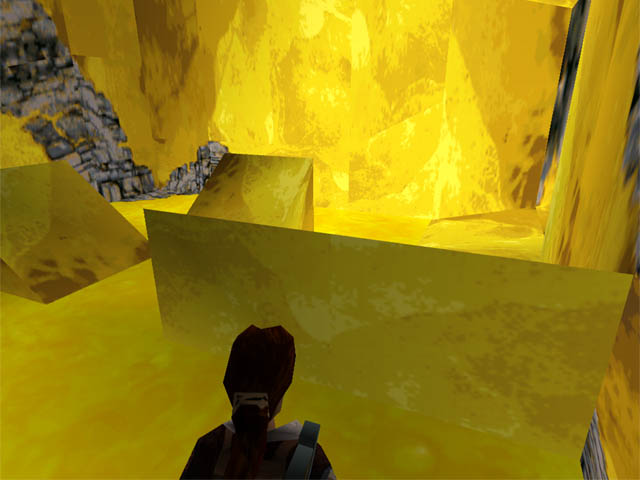
Now push the block inside the cage, onto the yellow floor tile to open the trapdoor. Climb down the ladder. Drop down. Around you, you can see yellow chambers with goodies. Drop down into the cave. Be careful not to drop into the molten bubbling gold.Yellow area with Goodies - can be skipped
Instead turn right and climb into the yellow passage. Jump up onto the block and make your way to the water. Jump in. In the right corner is a platform where you can climb out. Climb into the passage up on the right. Follow the path to Uzi Ammo, M16 Clips and a small Medi Pack. At the beginning of the goodie passage you can find another passage in which you can climb up. Slide down at the end and run back to the cave with the little molten gold lake.Slopes
Look over to the left, there is a slightly elevated platform in the molten gold. Take a running jump onto it.Goodies:
Turn around to see a pack of shotgun shells. Get there with a running jump. Collect them and jump back.
Look into the next room, where you will also find a puddle of molten gold. There are also three slopes. The right one of them has to be used to get to the exit. Jump onto the right part of the slope and while sliding jump to land on the safe platform. See picture! Run up the passage and climb out to the left.
Cave with Red Structure
Up here you will find a red structure in the cave. On the left you will find some shotgun shells, but also a creature will attack you. If you look through the fence you can see the "secret" gold coins. Now run down the hill on the right and get towards the opening in the floor.Cages and Switches
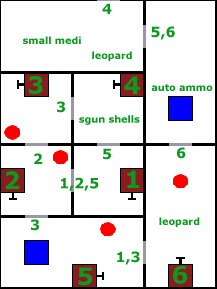
Goodies and Secret - can be skipped
Run down to the left. At the end is a slide. Press action while sliding down to grab the ladder. Climb carefully down and collect the Uzi Ammo in-between the spikes. Then climb up the ladder. At the top climb over to the left and drop carefully into the spikes. Walk through them to the other side and jump into the passage. Run out into the chamber. Ahead is a gate through which you can see the gold coins again. Collect the goodies on the left (Automatic Ammo and Flares).Secret 1:
Then run up the stairs in the dark passage between the two spots where you found the goodies. Run along the tunnel till you meet another passage. Run down to the left. In the chamber below you will find the Gold Coins. The trapdoor opens. Drop down to get back into the cage and kill the creature here. Run to the exit again.
Jungle Area
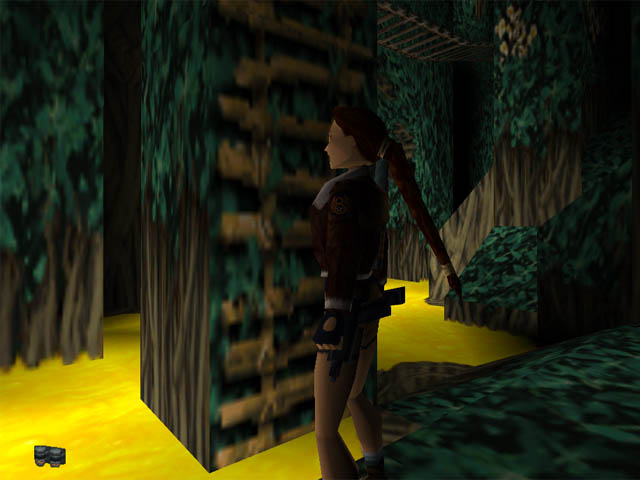
This time run up to the right. Climb up and at the top collect the large Medi Pack. Two of the strange cave creatures will appear. Kill them. Run down to the tree and jump into the gap between the trunk. Run out onto the wooden bridge.Goodies:
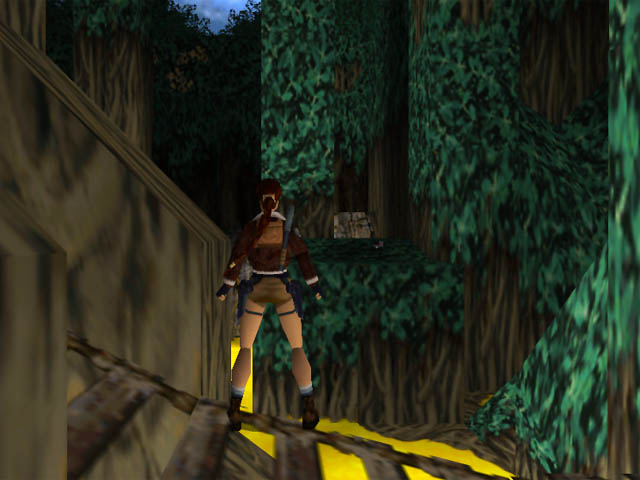
Look over to the left. There is a platform with automatic ammo. Turn to face it while standing on the highest part of the bridge. (See picture) Take a running jump to reach the left end of that platform and grab the ledge. You have to time this correctly or you will drop into the molten gold. Pull up and collect the automatic ammo.
Secret 2:
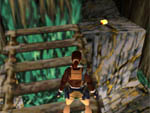 From here jump onto the stone wall at the back. You will slide down. Grab the ledge and shimmy left. Pull up at the end. Walk over to the other side where you can see another wooden bridge. Stand with your back against the outer wall, and make a sideflip right onto the slope in front of the bridge. From the slope jump up to the bridge and grab it. Pull up. Walk over to the right. There you can see a niche with the next secret. Jump over and collect the Gold Bar.

Goodies:
Slide down the slope. Take a standing jump over to the tree root with the M16 Clips. Collect it. Climb onto the higher block and from there take a running jump back towards where you started this section. Do not press action!
Again jump into the passage between the tree and cross the wooden bridge. On your left is one of those warriors you met before. Hopefully you left them alone, then he will be friendly. Run into the building.
Large Chamber
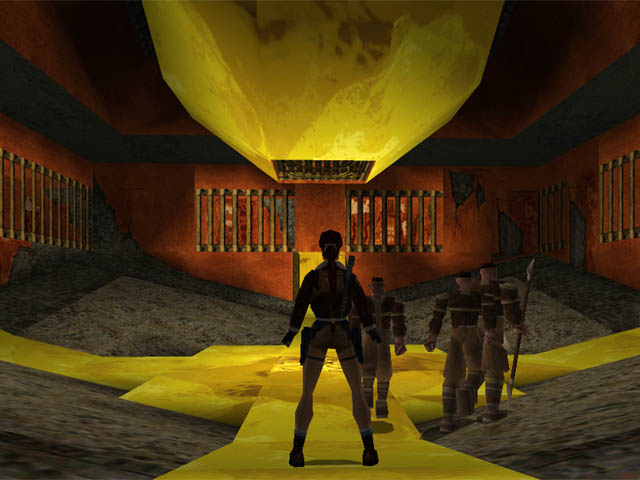
Enter the building and run into the passage you will find on the right. Through the window you can see a nasty chamber with molten gold streaming down chutes into a pool in the middle of the room. In the last alcove on the left you can find grenades. Run back to the entrance. You can find three switches, one right of the closed door leading into the main chamber and two on the outer wall opposite the door. Pull the switch right of the door to release a guy with M16, through the trapdoor of the structure in the middle, into the main chamber. Now turn around and pull the left switch. Three warriors will be released into the main chamber and they will take care of the baddy. Now pull the right switch to open the door into the main chamber. Enter the chamber. If you are attacked by the warriors you must have hit one and they will not forgive you your error. Collect the large Medi Pack in the middle. Picking it up will open a door and release another of those cave creatures. Climb back into the passage and kill it. Be careful not to hit a warrior. Now explore the left passage. In one of the right alcoves you can find automatic ammo. Step out through the open golden door on the right. Slide down into the green passage.Tree Tops
Take a standing jump onto the first branch.Goodies:
From here take a running jump towards the flares on the branch at the back. Collect them and jump back to the previous branch.
(See the wooden bridge behind the first branch? If you jump onto it and run to the right you can reach the small Medi Pack at the end of this section right away. You will not explore the upper tree tops.)
Go to the left and hang from the left ledge. Shimmy left to reach the ladder.
Goodies:
Climb down. At the end backflip onto the safe spot behind you. On the left you can see some grenades in the molten gold. This is a safe spot. Make a standing jump to get there and collect the grenades. Jump back and climb the ladder back up.
Climb up to the top and immediately take out the grenade launcher. Take care of the cave creatures. Collect the small Medi Pack. Jump towards the skeleton and run further along. By the next skeleton you will find some automatic ammo. Collect it, then jump over the gap to reach some M16 Clips. Collect it as well. By the second skeleton is a ladder. Climb down and collect a small Medi Pack.
Slides
Light a flare. Make a sideflip onto the golden slide. When you have dropped onto the green slide, jump to get over the gap and reach the next golden slide going down to the left. Slide all the way down till you end up on a golden platform with Shotgun Shells.Lower Part of the Jungle
Make a running jump onto the elevated golden platform between the trees.Secret 1:
This is a nasty one. You might have heard the sound of a trapdoor opening. This trapdoor is timed and around the corner on the right. Have a look at it so you have a good idea of where you are going. Go back to the beginning of this section and quickly run towards the open door. Drop down to find that the ground below is perfectly safe. Follow the passage and climb up. Also climb up the ladder at the end. When you reach the passage on your right, backflip onto the platform behind you. Climb up onto the red part. Now a lot of difficult jumps will follow.
Look at the ceiling. There are solid looking platforms around. Each square underneath a solid platform is safe. Run in a straight line towards the flares and pick them up. A leopard will attack. Take him out without stepping into any molten gold. There are two safe spots in the area on the left. Take a running jump onto the first spot. Then a standing jump onto the second further on the left. Turn left to see an alcove with the golden skull. Take a running jump to get there and collect the Golden Skull. Jump back the way you came. Now run in a straight line towards the small Medi Pack. Collect it and run into the adjacent chamber. Run up the stairs and step out through the open door. Slide down onto the platform where you have been before. Jump across the waterfall to the next safe spot. Climb up onto the next block and further up to the left. In the right corner you can find a slide. On the short ramp jump to the left to slide backwards down the second one. Grab the ledge at the end and let go. Slide further down to end up back on the golden platform where you found the shotguns shells. Again running jump onto the higher platform.
This time run past the trapdoor and kill the cave creature. Jump over to the green alcove and kill the next creature. On the left you can find some shotgun shells. Careful there is also a spike trap. Now climb over to the area on the right to find a small Medi Pack. There is also a third creature which will attack you. At the end, past another spike trap, you can find some Uzi Ammo. Get back outside and onto the golden walkways. At the end you can climb up onto the high column on the right. Make your way to the top to find a ladder.
- Slide down to the left onto the platform number.
- From here take a running jump across the first waterfall to platform number.
- The next safe spot is a bit below you. Position in the middle of platform 2 and take a standing jump onto platform.
- Two platforms lower is another safe spot. You have to jump there. If you slide you will slide sideways into the molten gold. From the upper part of platform 3 take a standing jump onto platform.
- Now you have to cross the next stream. A bit to your right is a higher platform on which you can stand. Take a running jump to get there. Do not try to grab the ledge.
- Look up the hill. Two blocks higher is another safe platform. Stand on the highest edge of platform 5 and take a standing jump onto platform.
- Turn slightly left and jump onto the next safe spot two squares up and one to the left.
- Now turn toward the slide on the left end. Jump onto it and slide down onto platform.
- From here take a running jump towards the waterfall. The wall will break and you can step through.
Look at the ceiling. There are solid looking platforms around. Each square underneath a solid platform is safe. Run in a straight line towards the flares and pick them up. A leopard will attack. Take him out without stepping into any molten gold. There are two safe spots in the area on the left. Take a running jump onto the first spot. Then a standing jump onto the second further on the left. Turn left to see an alcove with the golden skull. Take a running jump to get there and collect the Golden Skull. Jump back the way you came. Now run in a straight line towards the small Medi Pack. Collect it and run into the adjacent chamber. Run up the stairs and step out through the open door. Slide down onto the platform where you have been before. Jump across the waterfall to the next safe spot. Climb up onto the next block and further up to the left. In the right corner you can find a slide. On the short ramp jump to the left to slide backwards down the second one. Grab the ledge at the end and let go. Slide further down to end up back on the golden platform where you found the shotguns shells. Again running jump onto the higher platform.
Leopard Cave
Climb up the ladder. Run ahead and turn left. In the cave you have to fight two leopards. In the left corner you can collect two packs of M16 Clips and a large Medi Pack. By picking up the large Medi Pack you will open a door above the ladder outside. This will lead back to the beginning of the level, so ignore it. This is your way back when you have missed a secret. So instead head for the golden structure in the distance. Kill another leopard on your way.Golden Structure and Birdy
Climb up one of the ladders to reach the top. Place the Mask of Tornarsuk in the receptacle. The structure behind you changes and a giant bird will be released. You have to kill this creature, you can choose to do so the normal way, or you follow the rest of my walkthrough: Run up towards him and into the building on top. If you find the time collect the grenades and the large Medi Pack. Flip the switch to open the gate down by the receptacle. This done run back down and through the door. Run across the golden walkway and make sure the bird follows you. When on the other side, with the bird there as well, flip the switch to let the walkway vanish. Then drop down into the pit carefully. Collect the large Medi Pack in one corner. Walk through the spikes to the other side and climb the ladder. Turn around and bring down the bird on the other side. Pistols will suffice.© www.tombraidergirl.com Personal use only, no reproduction. Last changes: 20 Mar 2024, 03:08


