Version:
Revised in 2017.
Remark:
Please be aware that this is not a regular walkthrough. You can explore the rooms of the manor at your own leisure and in whichever order you like. Only if going for the racetrack key, there is a certain order you have to stick to.
Story:
"Let's go into the gym. Those of you who have been here before may notice the new decor. What do you think? Well, let's do some exercises. I think we should do them in order," says Lara when you enter the gym on the ground floor of Croft Manor.
General Info
Welcome to the Croft Manor for Tomb Raider III. This is the third time we get to see the manor and the last time it is playable up until Tomb Raider Legend, where a completely different manor will make its appearance.Walkthrough
Lara's Bedroom
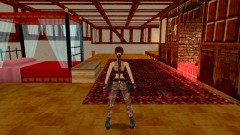
The visit of "Lara's Home" begins in Lara's bedroom. When you turn around to the left (directional buttons) you will find a small push switch between the closet and the bed that you can push with the action button (PC: Ctrl, PS: X). This opens the closet door. Inside is a pack of eight Flares that can be picked up by using the action button again. The room left of the closet is the bathroom, where there is nothing of interest to find. The bathtub inside is filled with water, but it's not enough to practice swimming. Lara will slowly wade through the water. Back in the bedroom, run to the other end, where you will find the doorway on the left leading into the main hall.Upper Main Hall
If you go to the right you will find nothing but a locked door. So instead head over to the left. Run past the stairs leading down to your right. On the left wall you will come upon a closed door and next to it a small push switch. Activate it to open the door to the attic. For now there is nothing else to do in the attic. Follow the way around the corner. You come to an open door leading into the music room.Music Room & Library
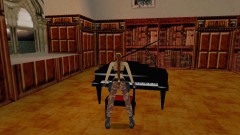
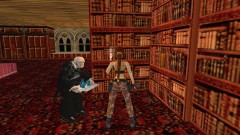
Enter. The windows inside allow you to look upon the quadbike racetrack and the roof of the poolhouse downstairs. Head up the short set of stairs to the left, into the library. On the right hand wall, in the corner with two bookcases you can find a protruding book. Press action to flip it around. The fire inside the fireplace is extinguished. Step into the fireplace and turn to face the left side of the chimney. If you look closely you can see darker spots in the bricked wall, these are footholds. Stand in front of this wall, as close as you can and press and hold the action button to make a Lara jump up and grab hold. Climb up using the directional buttons.Secret Passage
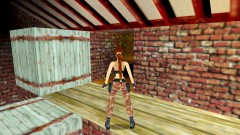
At the top you will find an opening to the right. Traverse as far to the right as possible so Lara's feet are above solid ground and let go of the action button to drop into the alcove. Run to the end of the tunnel and hop down. Continue towards the left and down two more steps, to finally reach a secret chamber with a movable wooden crate. Pull this once along the wall to the right. Where the crate was you can now pick up a pack of eight Flares. Then climb onto the crate and you will look straight into a tunnel with a second movable crate. Since the first crate can be used to stand upon, you can pull out the second crate twice. Then go to its right side and push it once into the left corner.Attic
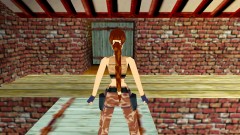
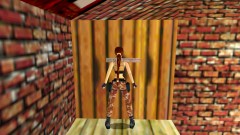
This has cleared the path to the attic. In case you haven't done that earlier, go down and open the connecting door between the attic and the upper main hall by activating the small push switch, which from this side can be found on the stairs at the end on the left wall. In any case get familiar with the path. If you like, you can take a glimpse out of the attic's window down onto Lara's balcony and the assault course in the garden. Then return to the secret room and find the wall lever at the right end of the elevated walkway. This will open a secret door underneath the stairs down in the main hall. This door is timed, so you have to hurry. While the cutscene is still showing you the opening door, perform a roll (PC: End or Up+Down simultaneously, PS: ◯) and start running along the path. At the end turn right, into the attic. After going up the step, turn left, into the narrow staircase. Here you can use the sprint button (PC: -, PS: R2) to move around faster. At the end turn right to come out at the top of the main hall. Jump over the banister early to land on the left stairs and immediately jump over the banister again to land downstairs. Perform another roll and quickly sprint though the hopefully still open secret door.Cellar with Fish Tank
On the stairs you can find eight more Flares and a small push switch that can open the secret door again when it closes. Follow the staircase down into the cellar and at the foot of the stairs follow the corridor around the corner into a large room with a giant fish tank. At the end of the room you will find a comfy lounge chair, a bookcase and a marble bust. Near the entrance, on the left, you will find a movable block. Pull it once over to the right, into the centre of the room, away from the fish tank. Then push it once down the passage, away from the entrance, so it ends up underneath an opening in the ceiling. Climb on top of the crate and face the left wall. You will see a ventilation shaft in the ceiling above you. Walk towards the edge of the crate, jump straight up and press the action button to grab hold of the ledge. Pull yourself in. Follow the tunnel. At the end, drop into the water. Take a deep breath before you set out to explore the fish tank diving. Dive along the glass wall towards the back and there turn around the corner to the right twice. Near the glass wall, around where the sofa is on the other side, you can find the Racetrack Key. Dive close towards the key and pick it up using the action button. Dive back towards the opening where you came in and climb out of the water. Backtrack through the shaft to return to the cellar room. There is not much else to do so head up the stairs again to return to the main hall. If you haven't done so yet, open the door by pushing the button on the wall.Gym
If you now turn to the right, you will reach the gym. Here Lara will advice us to do the exercises in order.1: Walking
Head up the ramp with the number 1. "I don't actually run everywhere. When I want to be careful, I walk. Hold down the walk button and walk to the white line." Following Lara's instructions, walk up pressing and holding the walk button (PC: Shift, PS: R1), till Lara automatically stops at the white line at the top. "With the walk button down, I won't fall off, even if you try to make me. Go on, try it." Then let go of the walk button to hop down and approach the next exercise.2: Grabbing the Ledge
Now walk up ramp number 2. "If a jump is too far for me, I can grab the ledge and save myself from a nasty fall. Walk to the edge next to the white line until I won't go any further, then press jump immediately followed by forward, and while I'm in the air, press and hold the action button." Walk up and to the right, till Lara stops at the white line. Now in rapid succession press jump (PC: Alt, PS: □) and up. While in the air press and hold the action button. Lara will grab the ledge of the next obstacle. "Press forward and I'll climb up." Press up, like Lara has instructed you to, to pull up onto the obstacle.3: Running Jump
"If I do a running jump, I can make a jump like that no problem. Walk to the edge with the white line until I stop, then let go of walk and tap backwards to give me a run up. Press forward and, almost immediately, press and hold the jump button. I won't actually jump until the last minute." Follow the instructions. Walk to the edge, hop backwards and start running while holding down the jump button. Lara will automatically jump when she reaches the edge and land on the next block. Hop down and turn to the next obstacle.4: Running Jump and Grabbing the Ledge
The next exercise is nothing new, just a combination of the previous two. Head up ramp number 4. "Okay, this is a huge jump. So do a running jump exactly as before, except while I'm in the air, press and hold the action button to make me grab the ledge." Walk around the corner to the left and step up to the white line. Just like with the previous exercise, hop back, start running and press jump to jump off at the edge. This time, once you're in the air hold down the action button to grab the ledge. Pull up. "Excellent!" Hop down to the right.5: Shimmying Sideways
Head up ramp number 5. "Try to vault up here. Press forward and hold action. I can't climb up because the gap is too small, but press right and I'll shimmy sideways until there is room. Then press forward and I'll climb right up." Run forward until you bump into the wall. Now press up and hold the action button to make Lara jump up and grab the ledge. As long as you are pressed against the wall, you don't need to press jump in addition. Holding the action button, shimmy over to the right, till you reach the opening, where you pull up. "Well done. If there is a long drop and I don't want to hurt myself jumping off, I can let myself down carefully. Tap backwards and I'll jump off backwards. Immediately press and hold the action button and I'll grab the ledge on the way down." I will deviate a little from this next exercise. First press and hold the action button before jumping backwards over the edge, this way you will avoid pressing the button too late. "Then let go." Let to and turn right towards the next exercise.6: Crawling
Run up the ramp with the number 6. "Next, I'll show you my crawl. First, vault onto the block, now hold down the crawl button - this will make me crouch down - and keep holding it while using the direction buttons to move me through the gap. At the end, turn around and drop me off the ledge. Make sure to keep the action button pressed or I'll fall. Now let go." While on the ramp turn left and jump up at the wall and pull into the opening. Press and hold the crawl button as instructed, while navigating through the gap. Once you're inside the crawlspace you can actually let go of the button, the low ceiling will keep Lara from standing up. At the end turn to face left so your feet are pointing towards the ledge. Crawl backwards, while holding down the action button to lower yourself onto the ledge. Let go to safely drop to the ground. "Push forward and hold down the crawl button to make me squeeze into the gap." Thank you, Lara, but we already did that.7: Climbing and Monkey Bars
Turn towards the ramp number 7. "To get to those really high places, sometimes I'll need to climb. Let's try that now. Walk up to the climbing frame, then press and hold the action button so I'll climb up onto it. While keeping this button pressed, push forward on the direction buttons and I'll climb to the top." Walk next to the orange scaffolding, turn to the right to face it and climb up like instructed and pull up on top. "Now looking up, you'll see some monkey bars. These look like fun. Press the jump button, then immediately hold down the action button to make me jump and grab hold of the bars. Now use the direction buttons to manoeuvre across. Don't let go of the action key, because as soon as you do, I'll let go." Turn to face right and jump straight up. Press the action button, to grab hold of the monkey bars. Move along them to the other side. Once you've reached the other tower, you can safely let go to drop onto it. "That's great." Now turn your back towards the edge in front and hop backwards will holding down the action button to grab the ledge. Keep holding down the action button, while using the directional buttons to climb to the ground floor.8: Sprinting
Step onto the blue mat. "Right! Let's sprint! Push forward and hold down the sprint button. When I reach the white line, press the jump button and I'll perform a diving roll." Like instructed, run along the blue course and hold down the sprint button (PC: /, PS: R2) to sprint along. When you reach the while line, perform a diving roll using the jump button. "Okay, fancy a swim?"Swimming Pool
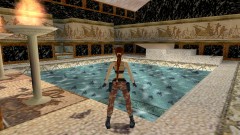
Now that the exercises in the gym are all done, you can explore the pool house. When entering, Lara explains how to dive. "The jump button and the directions move me around under water." Get over to the other side and step onto the diving board. Perform a swan dive into the water by pressing the jump button (PC: Alt, PS: □), up and the walk button (PC: Shift, PS: R1) at the same time. Take a dive while under the surface. You can even make sure that the underwater-turn still works by pressing the roll button (PC: End, PS: ◯). Then swim towards the surface. "Air. Just use forward, left and right, to manoeuvre around on the surface. Press jump to dive down for another swim or go to the edge and press action to climb out." Swim towards the edge of the pool and vault out of the water with the action button. "Right. Let's go and play outside." Press the small push switch located behind the diving board and you are shown that a secret door in the wall panelling of the main hall opens.Treasure Room
Cross the pool house and the gym as well, to return to the main hall of Croft Manor.© www.tombraidergirl.com Personal use only, no reproduction. Last changes: 23 Jul 2017, 00:52


