
")


12. Natla's Mines
Water Cavern
At the start of this level, Lara is in the water. Swim ahead. The ridges up on the wall on the right cannot be reached. Swim behind the waterfall and climb out there. Follow the tunnel and climb up. Run up till you come to the edge. Jump towards the horizontal bar and swing to the metal ledge ahead. Shimmy to the left end and jump over to the second ledge. From there jump towards the rope behind you. Stand on the dangling crate and from there running jump to the second crate.Find:
Turn right and jump onto the top of the stack of crates. Collect the Large Medipack, then jump back to the dangling crate.
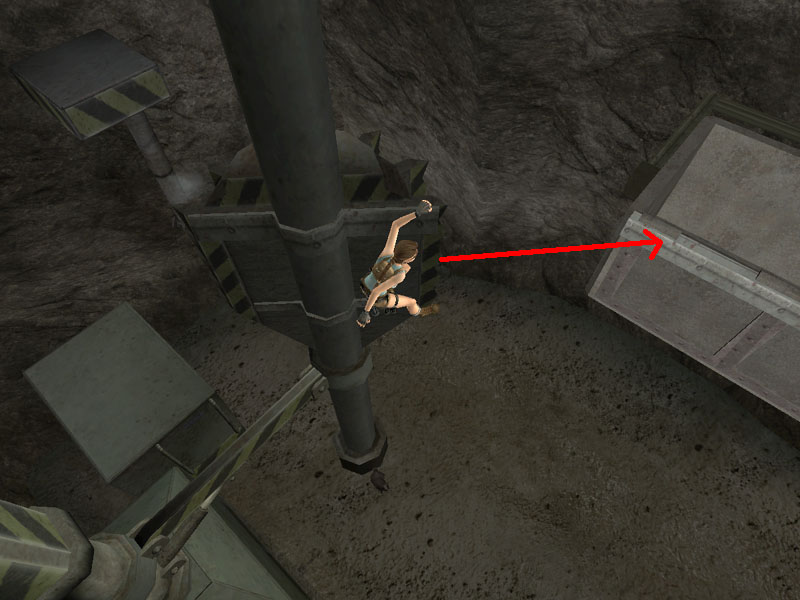
Turn towards the rope and jump there. Use it two swing towards the upper crevice left of the waterfall. There shimmy around to the right, behind the waterfall. Jump backwards to the fenced area on the right by the waterfall. Pull up. Follow the tunnel all the way down into the mines.
The Mines
On the right you can see a hut. Inside on a crate you can spot your guns. Ahead, on the left is a control centre. Inside you will need three fuses. As we don't have them yet, ignore it for now. We will also ignore the large medipack on the top crate just in front, as we need to climb in later anyway. Instead follow the railway tracks to the left. The path on the right is barred.Red Fuse
At the end you will come on another control room. Tow rats lurk in this area. As you don't have any guns, flee from them. In the mine cart parked on the left you can find a Red Fuse. Behind the fence on the right you can see another area and another fuse lying there. However you cannot reach it from here. Run back along the tracks to come back to the control room to your left. Run up the stairs and enter. Run to the left control panel where you can insert the red fuse. Do so and then use the button right next to it. The crate above the hut opposite moves to the left, revealing an opening in the wall behind it. Run back down and towards the yellowish crate left of the hut. Climb onto it and from there jump to grab the ledge of the hut's roof. Pull up. Run to the other side.Secret (Artifact):
Look down ahead. There you can see two metal poles sticking out from the ground. Jump on top of the closest one. Keep your balance and jump on to the second. From there jump towards the ledge in the wall ahead. Shimmy to the left and jump over to the ledge in the left wall. Jump up to the upper ledge and from there backwards to the horizontal bar behind you. Swing towards the slope. From it jump over to the next part of the walkway. Pull up and collect the Artifact. Drop back to the ground and then climb onto the hut again.
Climb into the opening on the left, that was hidden behind the crate. Follow the passage. Run to the end and jump across to the next entrance.
Passageway
Follow the passage further. At the end lower yourself onto the walkway in front of the passage. Turn left.Green Fuse
There you will find a crate. Push it down, just in case you will need it to get back up. Jump to the next walkway. There turn to face the wall on the right. Jump towards the left of the two crevices. There Jump straight up to the upper ridge. Shimmy left and from the end jump over to the next walkway. Turn right and jump onto the slope. Quickly jump towards the next walkway. Turn right at the end and jump to the next walkway. Lower yourself down, over the fence to drop down to a spot where the Green Fuse can be picked up. Turn to face the pit. Below you can see more that can be explored, but not from up here. We will get there later. Jump ahead and throw out the grapple to run along the wall. At the other end, jump over to the left side. Remember: Jump sideways, when Lara is turning. Shimmy to the right and jump over to the next ledge. Pull up. Climb up the ladder and at the top jump to the left, over the fence. Run back to the control room.Using the Green Fuse
Enter the control room again. Insert the green fuse in the middle console. Use the lever next to it. The arm of the crane will swing around. Then use the red lever again to move the crate along the crane, to the front end. Get back outside. Climb the stack of smaller crates and from there jump to the larger stack with the covered crates. Climb to the top crate and finally collect the Large Medipack. From here jump towards the dangling crate. Lara will grab the top. Shimmy around to the left. There jump backwards to the walkway. Run along and into the tunnel on the left. Run forward till you come to a bend. Turn right. Climb down the ladder. Run to the next edge and climb down the second ladder. Step to the edge and running jump to the ledge opposite. Drop down twice on the right end to safely land on the slope. Run over to the other side of the pit.Blue Fuse
All three Fuses
Enter the control room again. Insert the Blue Fuse. Activating the corresponding lever will lower the crate outside, but this won't get you anywhere. You need to so something else first. Use the green lever to swing around the crane, back to the hut. Then use the red lever to move the crate over the middle of the roof. Now use the blue lever to drop the crate and shatter the roof.Getting the Guns
Get back outside. Climb once more onto the yellowish crate left of the hut. Jump towards the roofs edge and pull up to drop inside. Pick the Dual Pistols from the crate. Then use them to shoot the windows. Climb outside and finally kill the two rats. Now it's time to get two secrets. Run back to the passage you came down at the beginning.Secret (Relic):
Run up to the top and there jump down into the water. Swim to the shore. Climb onto the stack of higher crates. There turn around and look towards the horizontal bar up at the cave ceiling. Shoot the rope of the crate dangling a bit to the right. Avoid shooting the other crate as it would make getting back across difficult. It will fall down and open up. Climb down and collect the Chalice of Torment that was inside.
Secret (Artifact):
Then shoot the rope of the inflatable boat. It will drift along to the tunnel where you came in at the start. Jump in the water and follow the boar. Get onto the boat and from there up to the ledge in the left wall. Jump over to the right, to the next crevice. There jump up to the upper one. Shimmy to the right corner. There jump backwards to a ledge behind you. Shimmy to the right and around the corner. Jump towards the next ledge and shimmy right, to the alcove. Drop down and collect the Artifact behind the crate on the left.
Jump into the water and return to the opening behind the waterfall. Run up again. Jump to the pole and from there along the ledges, to the remaining dangling crate and the other two ropes. Swing back to the ledge left of the waterfall and get behind the fence up there again. Follow the passage back to the mines.
Run along the tracks to the left again to come back to the mine car where you picked up the first fuse and the control center.
The Drill (1)
Use manual aim to shoot the windows of the control center. Then mount the crate right of it and from there jump to the crevice of the control center. Shimmy around to the left, till you can pull up. Enter the room and press the button on the console in the corner. Outside the mine car will be removed from the tracks and replaced by the drill. Get back down and step onto the drill. Press the button to activate it. It will take you back to the main chamber. Back there you will meet Larson, who has blocked the path.Showdown with Larson
The next interactive sequence follows. The combination here is:- Up (PC) / R1 (PS2, PS3) / RT (Xbox 360)
- Up (PC) / R1 (PS2, PS3) / RT (Xbox 360)
- Up (PC) / R1 (PS2, PS3) / RT (Xbox 360)
The Drill (2)
Pick up Larson's Shotgun. Then return to the control room and insert the blue fuse again. Press the button for it, to raise the crate from the tracks. Then return to the drill and activate it again by pressing the button. It will break through the barrier at the end. Step past, into the Lava Room.Lava Room (1)
Jump over to the left to the platform in the lava there. From here continue onto the top of the long pole straight ahead. Jump on to the slope and further to the second slope before you fall into the lava. Jump again to reach the smaller pole. (1)Find:
Turn your back towards the larger pole and jump backwards to reach it. (2) Climb up and face your back towards the platform from where you earlier jumped onto the top of this pole. Grab the lower crevice (3) and shimmy around to the left. (4) At the left end, jump left towards the tiny pole sticking barely out of the lava. (5) Turn slightly left and jump onto the platform underneath the arch. (6) Collect the Dual 50 Caliber Pistols. Then jump back onto the tiny pole. (5) From there jump back to the ridge on the tower. (4) Shimmy around to the right (3) and jump backwards to the long pole again. (2) While holding on to it, turn your back to tiny pole and jump onto it again. (1)
Turn and jump towards the crevice of the tower nearby. Shimmy around to the left and there jump to the upper ridge. Then jump backwards onto the next platform.
Lava Room (2)
Ahead in the other direction is a grapple spot over your head. Jump there and swing towards the slope at the other end. Jump to reach the horizontal bar. It swings around. (1)Secret (Artifact):
Turn around to see the platform just in front of you. (2) Swing there. As soon as you leave the horizontal bar, it swings back. Collect the Artifact and the Small Medipack. Then jump over to the small pole sticking out of the lava to the right. (3) Turn around to the right and jump towards the next pole. (4) Continue onto the slope. (5) Jump back onto the horizontal bar. (1).
While hanging from the bar, face the next slope. Jump there and from it jump to the ridge of the tower. Jump up to the upper ridge. From there jump up to the top.
Find:
From the top, turn around to the right. Above is another grapple spot. Use it to reach the alcove up on the left where there are some goodies. Collect the two clips of Mini SMG Ammo and a Large Medipack. Then you may swing over to the exit.
Get to the exit and run into the passage.
Following Kold and the Kid
You can jump onto the slope with the whitish shimmer on the right and from there jump again to reach the ledge up on the left. Pull up and jump up to the next ledge. Pull up again and turn right. Pull up the next ledge. Turn to the other side and take a running jump to the upper of the ledges. It might be easier for you to jump to the lower and then climb onto the upper. Turn back to the other side and jump onto the slope to reach the cave from there. Here you will be greeted by the other two of Natla's goons.Fighting Kold and the Kid
The next interactive sequence follows. The combination here is:- Down (PC) / Circle (PS2, PS3) / B (Xbox 360)
to dodge Kold's knife - Up (PC) / R1 (PS2, PS3) / RT (Xbox 360)
to shoot at Kold - Up (PC) / X (PS2, PS3) / A (Xbox 360)
to jump over Kold
Gaining Entrance to the Pyramid
Not it's time to gain entrance to the pyramid. Pick up the Dual Mini SMGs from the Kid and then examine the entrance. Then run over to the left crate. Push it towards the rocks left of the pyramid entrance. Climb onto it and from there up to the elevated ledge. Run into the corner. There climb up the ridge on the right. Jump to the top and pull up. Jump up to the next ridge and shimmy around to the right. At the end jump over to the rocks on the right. From there jump up to the next crevice. Jump up again and pull up to the top. Look towards the top of the pyramid.Find:
In the wall below you is an opening. Jump onto the slope and jump again to reach it. There you will find a Large Medipack and two packs of Mini SMG Ammo. Collect them, then climb out of the alcove. Jump onto the slope again, this time a bit further to the right to jump back onto the rocks from there. Climb the two ledges to the top again.
Look at the poles sticking out of the surface of the pyramid. Some of them - six to be exact - have symbols on them. These are triggers, which you have to use. There are three on this half of the pyramid.
Please note that there are many different ways to do the next part. I suggest you find your own way. It might also be wise to take a rest from time to time and maybe even go back down to pass a checkpoint and save your progress. - The one in the cavern is not far.
Start by jumping onto the pole closest to you, that is not a trigger. (1) From there jump onto the next non-trigger pole further up, to the right. (2)
Then turn up to the left and jump onto the first trigger-pole there. (A) The first symbol on the door lights up. Quickly jump back to the previous pole. (2) If you miss here, or anywhere later, get back up onto the rocks and start at (1).
This time turn right and look down. Jump onto the next trigger-pole. (B) Again jump back to the previous pole. (2)
From there face the next pole up on the right and jump there. (3) Now turn to the next pole up on the left and jump there. (4) Your next target is the trigger-pole up on the right. (C)
Look down to the right and quickly jump onto the pole closest to the line splitting the front of the pyramid in half. (5) If you miss and reach the bottom of the room alive, try it from the start. Take the following route: 1 - 2 - 3 - 4b - 5.
Now simply jump across to the other side of the pyramid, to the next trigger-pole. (D)
From there jump onto the next pole a bit further down. (6)
Then jump on to the next trigger-pole up to the left. (E)
This jump is not an easy one. You have to jump to the upper left corner of the pole. If you are not as good in jumping around, I suggest you take a little detour. Jump onto the pole underneath E and from there on to (7). From there you can jump to (E).
Here turn to face the final trigger pole and jump onto the single pole in-between. (7) From there jump on to the final trigger-pole. (F)
Secret (Artifact):
Quickly face the wall with the artifact on top and jump towards the crevice there. If you miss this jump, you need to pick up the artifact, after finishing the level, as all the poles will come back out once the door is opened, but for now you only got one chance. - Also note the large medipack lying below.
If you were lucky (or skilled) enough to grab the ledge, shimmy to the right and around the corner. From the end jump over to the outcrop to the right. From there climb up to the top. Pick up the Artifact. After collecting it, jump up, onto the slope of the pyramid. Lara slides down, Collect the Large Medipack here.
Our final target now is the alcove at the top in the middle of the pyramid. Get back to the start on the left side and jump along the remaining poles again. As several are missing you need to take a little detour. You need to jump all the way across to the other side and there up in a half circle to reach the alcove from the left. (I don't feel like giving a detailed description as you would probably be totally confused halfway through. ) In the alcove use the lever to open the pyramid and finish the level.
© www.tombraidergirl.com Personal use only, no reproduction. Last changes: 15 Feb 2024, 19:02


